
- View Course List - Brings up a new screen showing all the routes stored on this device. You can open them for racing, send them to a friend, export them, edit them or delete them.
- Plan a New Course - Create/save a new route from scratch by dragging points on a map.
- Workout - Just start running/ biking/whatever, your course & performance will be saved.
Selecting "View Course List" will open the screen below:
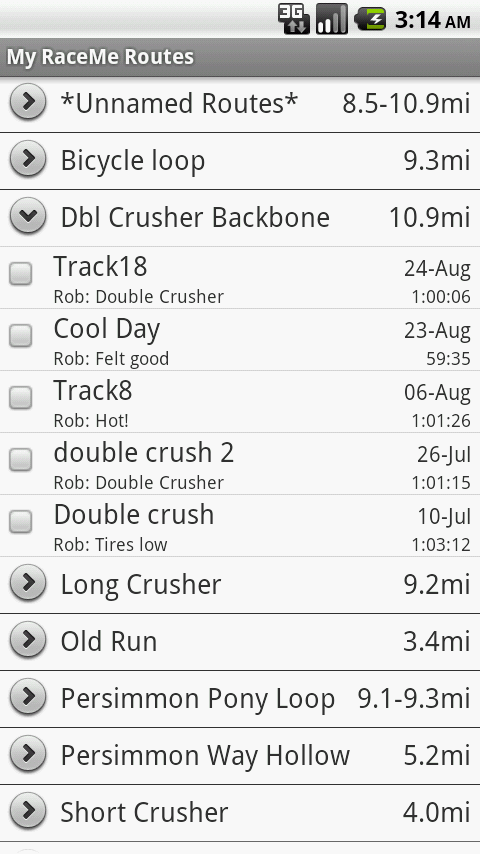
This screen, shown at left, shows all of the routes stored on the attached SD card.
Routes are grouped according to the name provided. Unnamed routes are collected together in a category. The routes are sorted in alphabetical order, and can be selected to expand or collapse the list of workouts assoicated with that route.
When the workout list is expanded you can see each workout, sorted so that the most recent are on top. If the route includes workouts with a range of distances, then each workout will list its distance separately, otherwise it will simply display its name, date, elapsed time, creator, and any description entered.
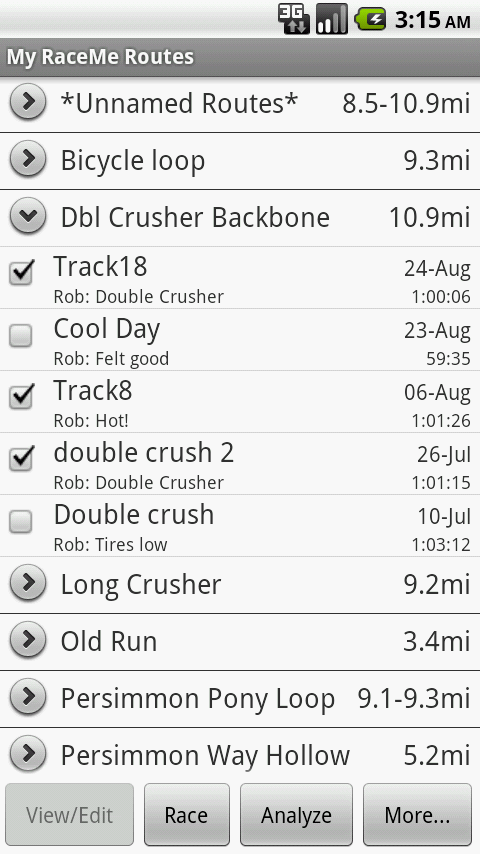
Touch a route to load it into the course review screen, for use in a workout or for editing. If it was recorded during an actual workout, the workout performance will also be available as a virtual competitor. Holding your finger on a course will open a menu of additional options, as seen in the screen below. Holding your finger on a route heading will bring up the Route Menu.
Whenever you are prompted to enter the name of a route for a workout or group of workouts you will be given a list of possible matches among pre-existing routes as soon as you start typing. This makes it simple and quick to group workouts appropriately.
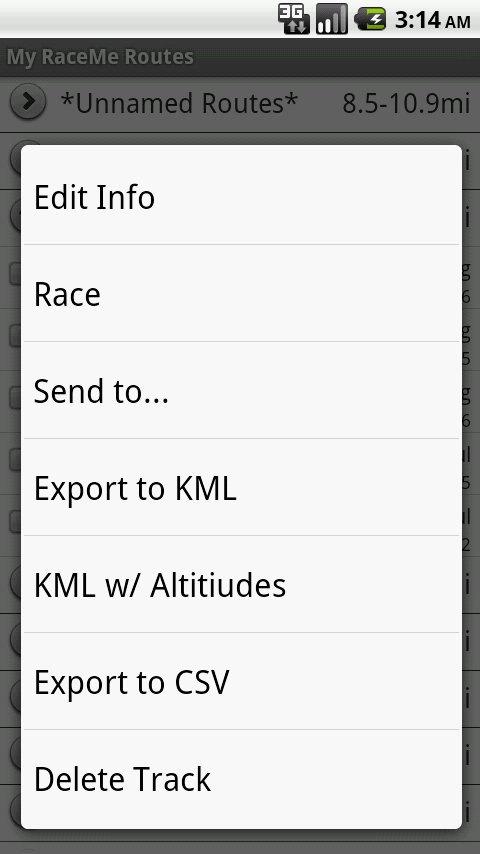
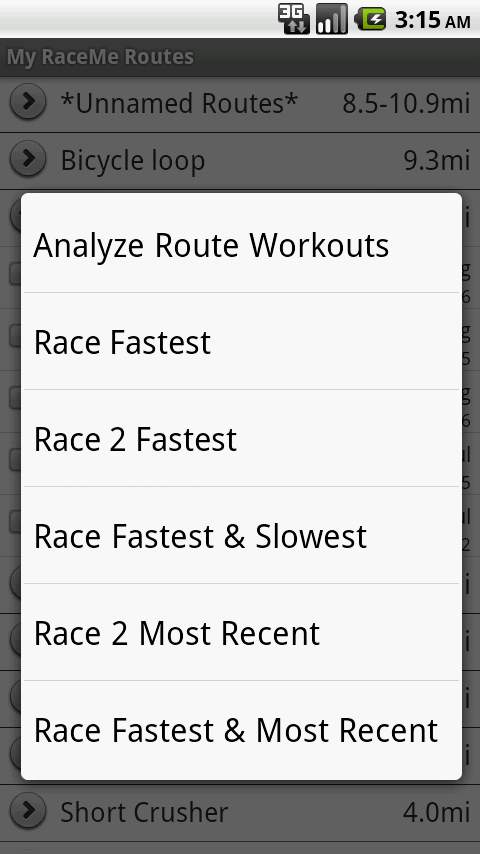
By "long pressing" any given route, you can access the menu at left. These options permit you to share your performance, challenge friends to virtual races, analyze your results, export to spreadsheets for graphing...
Options which export files write them to the SD card in: /sdcard/IRIS/RaceMe.
By "long pressing" any given route heading, you can access the menu at right. These options permit you to visually analyze all of the tracks in a given route (equivalent to selecting every workout in a route and pressing "Analyze"), or choose appropriate prior workouts to race against. You can also use this menu as a shortcut to select all of the workouts in a route.
This screen is accessed by selecting "Plan a New Course" in the Main Menu, touching a course in the Route Menu, or at the end of a recorded workout.
Coming from the Main Menu, you will start with a simple 5mi square course from your current position.
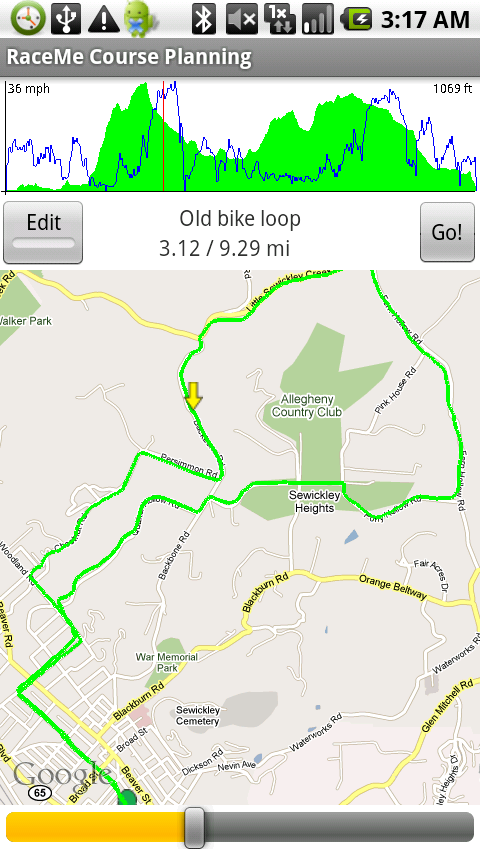
The selected course is displayed as a green line on the map. If that course includes performance data, such as with recorded workouts, the speed and altitude will be plotted at the top. The bar at the bottom represents the total time span of the workout. Running your finger along it will cause cursors in the map and the graph to indicate the corresponding point in the workout, while the speed and altitude (and, optionally, grade) at that point are shown along the top of the graph.
If you are reviewing a workout just completed in which there were competitors, red position markers will also slide along the map to indicate their positions at any given point during the workout.
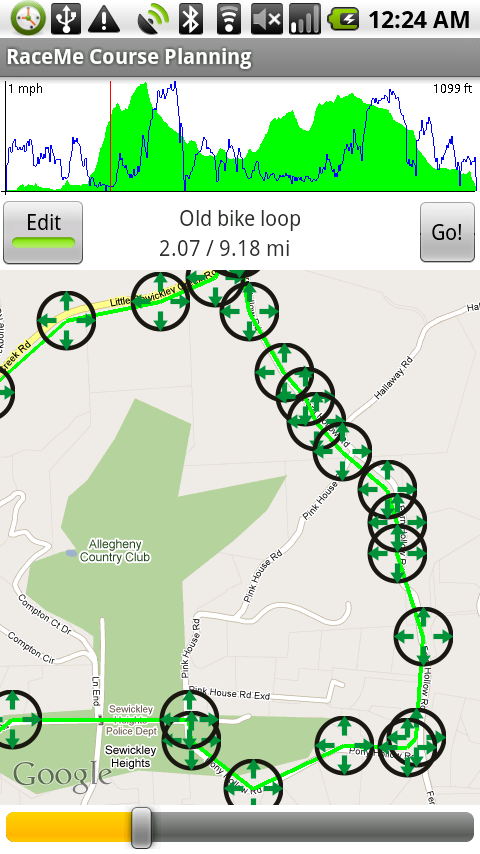
The "Edit" button will add markers at points along the route where the direction changes. If the workout was recorded live the route will be simplified automatically to make editing practical. The last segment of a course is shown in red. Drag the markers to reposition them. Drag to the edge of the map to automatically pan. Touch along a route line to add a new marker. To delete a marker, drag it on top of one of the adjacent markers (a trashcan icon will confirm that release will delete). Tapping or dragging on other areas of the map will have the normal pan/zoom effects.
The action button will either say "Workout" to load the course into the workout screen, or "Save," depending on the context. The Menu/Save option can also be used to preserve the course.
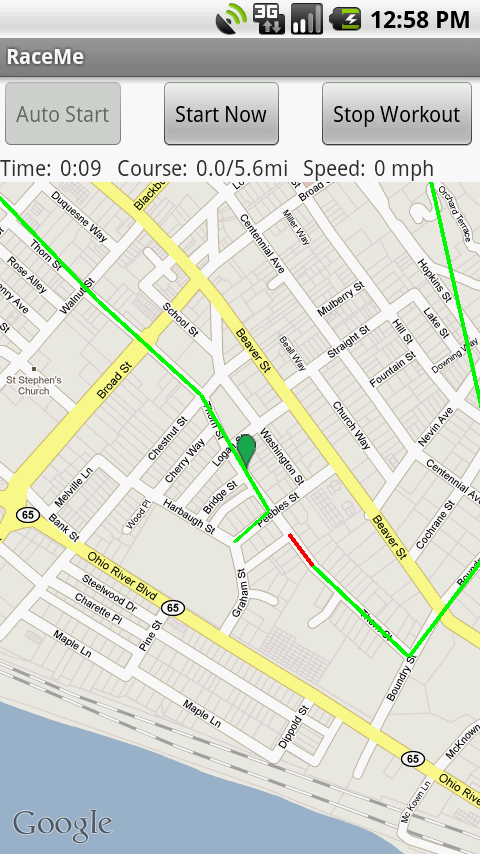
This is the screen that should be open during exercise. Start a workout by pressing either of Start buttons along the top. "Auto Start" will wait until motion is confirmed before starting the clock, so your phone can be situated for exercise. If the screen will not be visible during exercise, you may turn it off, RaceMe will continue to run and provide its audio reports.
During workouts the Auto Start button will be replaced with a "Pause" or "Resume" button, as appropriate, to permit delays in the middle of a workout from being considered in the workout time or other performance measures.
Audio reports, including time, distance, pace and competitive standing are configured in the Settings menu, shown below, which can be accessed with the Android menu key from any RaceMe screen.
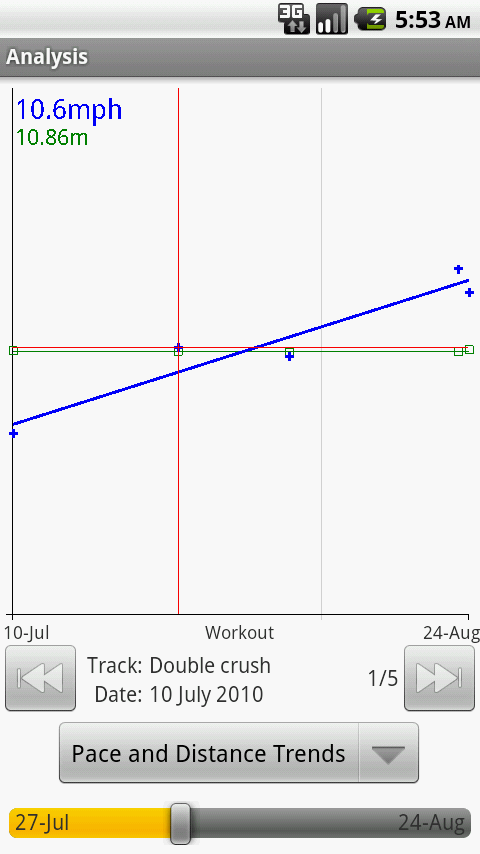
Selecting "Analyze" from the Route List brings you to the screen at right.
Here you can explore your workout history in several ways described below.
Shown here is the Pace and Distance Trends graph, which is a scatter plot showing the average pace or speed and total distance of any selected workouts, in chronological order, with trend lines showing the net change.
You can use the slider at the bottom to move between workouts on the timeline, or the arrow buttons to jump from one workout to the next. The details for the selected track are provided in the top left corner of the graph.
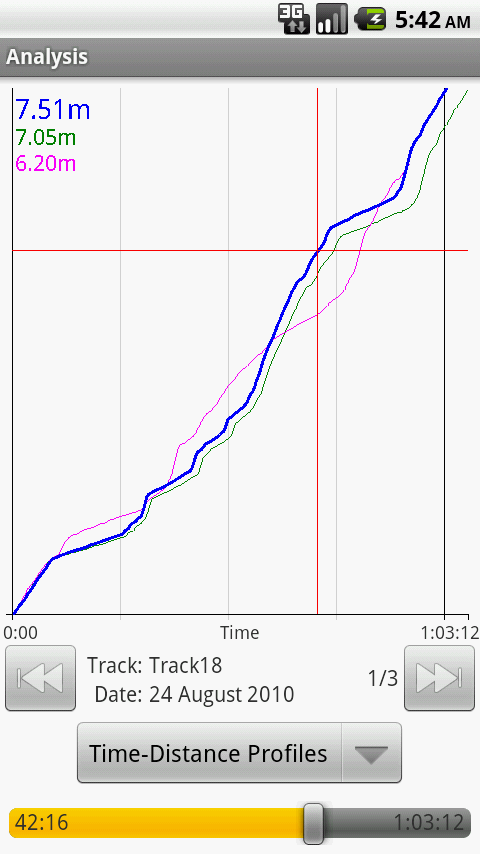
Selecting this graph type shows distance along the bottom and workout time along the from the left edge. Sliding the control at the bottom lets you review position details at any point, and compare them among workouts. The details printed in the top left corner are sorted such that they correspond to performance.
Selecting different workouts with the arrow buttons causes that workout, and its details, to be highlighted in the graph above.
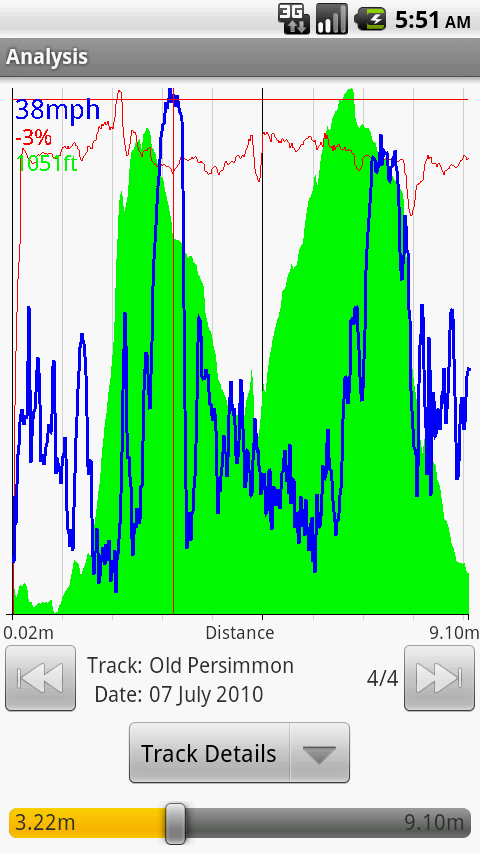
Selecting this graph type shows the details of a given single workout, as in the View/Edit screen. The arrow keys can be used to quickly jump from one workout to another.
The program features are all tuned from this menu, which can be reached from any RaceMe screen. Most settings will
take effect immediatly, even when changed during a race.
The "Pre-defined Route Settings" options displays a submenu which controls features associated with workout along a route which has already been stored. You can request directions, or enable various announcements to describe competitive positions or passing.
The "Announcement Settings" options displays a submenu which generally controls speech behavior, so RaceMe can give you the information you want without annoying you with too many uninteresting inter- ruptions.
"Media Button Pause" will use the play/pause toggle button on your Bluetooth or wired headset to pause and resume your workout, so your phone never has to leave your pocket!
Since RaceMe can be helpful for planning courses to fit a training schedule, we've included basic spoken directions as an option in the Pre-defined Routes menu. Note that RaceMe does not use a roads database, so it announces changes in direction, rather than changes of street.
